This is my second video in the series of Tips and Tricks in performing laparoscopic surgery. I will be talking about carbon dioxide insufflation and insertion of the first trocar during laparoscopic surgery. I already have a video entitled Complications in Laparoscopic surgery so I will not repeat what I have already discussed in that video. I will discuss on some questions frequently asked by my trainees and Fellow on carbon dioxide insufflation and first trocar insertion.

This is an important step. Make sure you personally check that the insert and the sleeve match. The Verres needle has 2 parts, the outer sheath which has a sharp end and the inner part, which is spring, loaded. They are of different lengths. Sometimes the outer sheath is assembled with the wrong inner sheath. It is very dangerous when the inner sheath is shorter that the outer sleeve as the outer sleeve is not protected by the inner sheath. Also make sure that the spring on the inner sheath works well before starting the surgery.
2. What precautions should you take when placing the Veress needle?
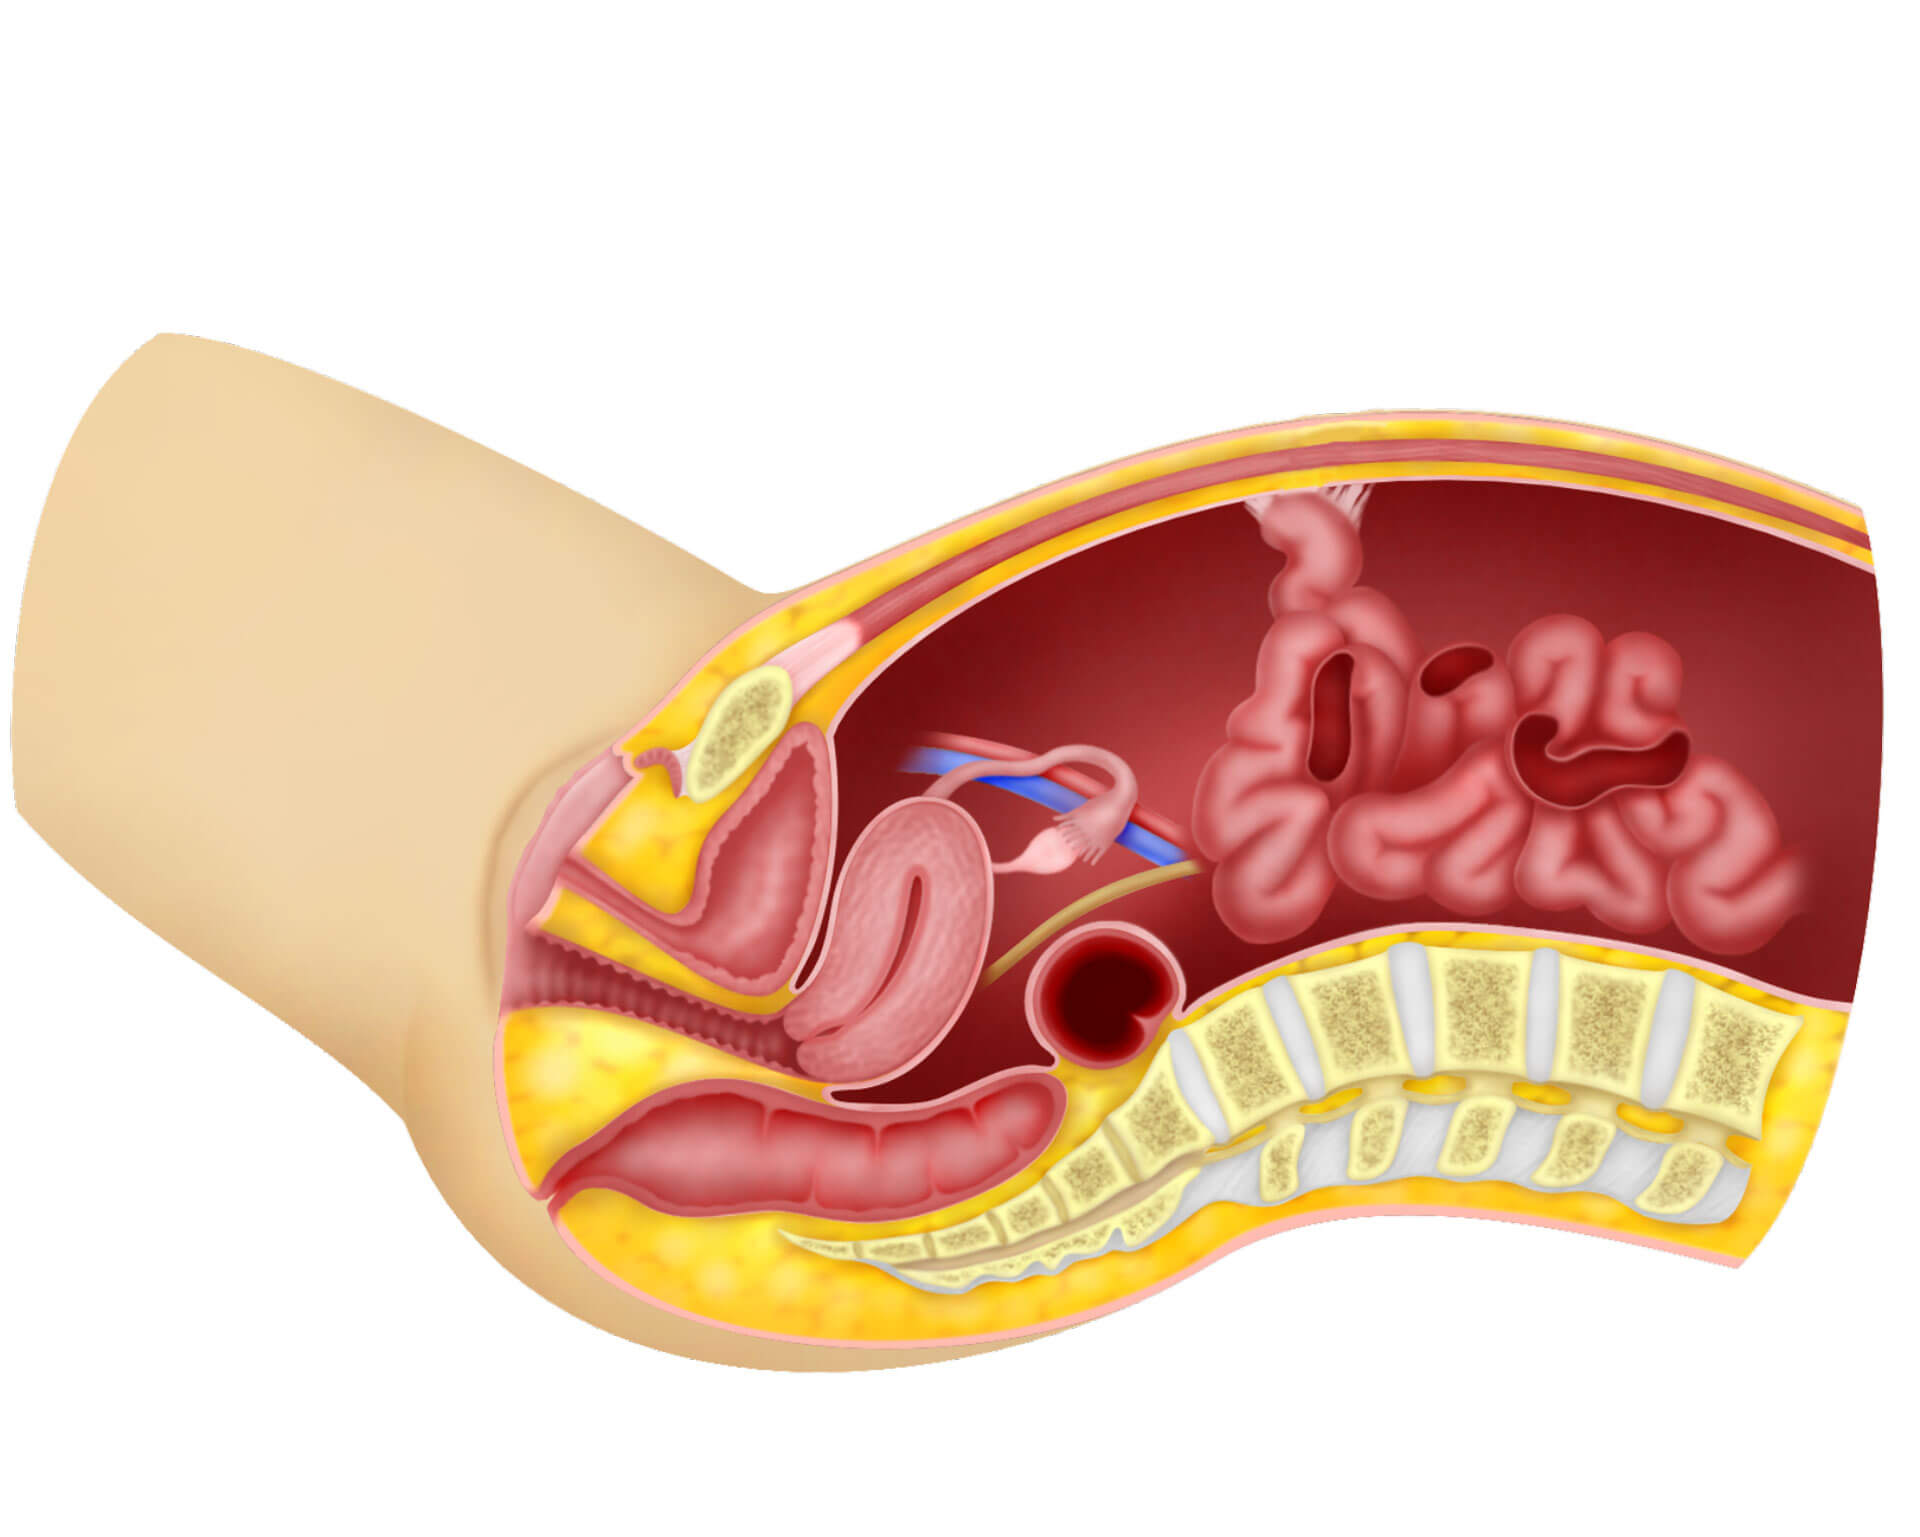
If the patient has a midline incision or there is a suspicion of bowel adhesions at the umbilicus, do not place the Veress needle in the umbilicus. Choose another method for insufflation such as the Palmar’s point. If you have chosen to place the Veress needle at the umbilicus then first make a small incision in the umbilicus. Take the following precautions.
- The patient must be in the supine position. Do not place the patient in the Trendelenburg position when placing the needle into the abdomen as this might confuse you on the direction of entry of the Veress needle.
- In thin patients place the needle at an angle of 45 degrees, In obese patients place the needle perpendicular to the abdomen.
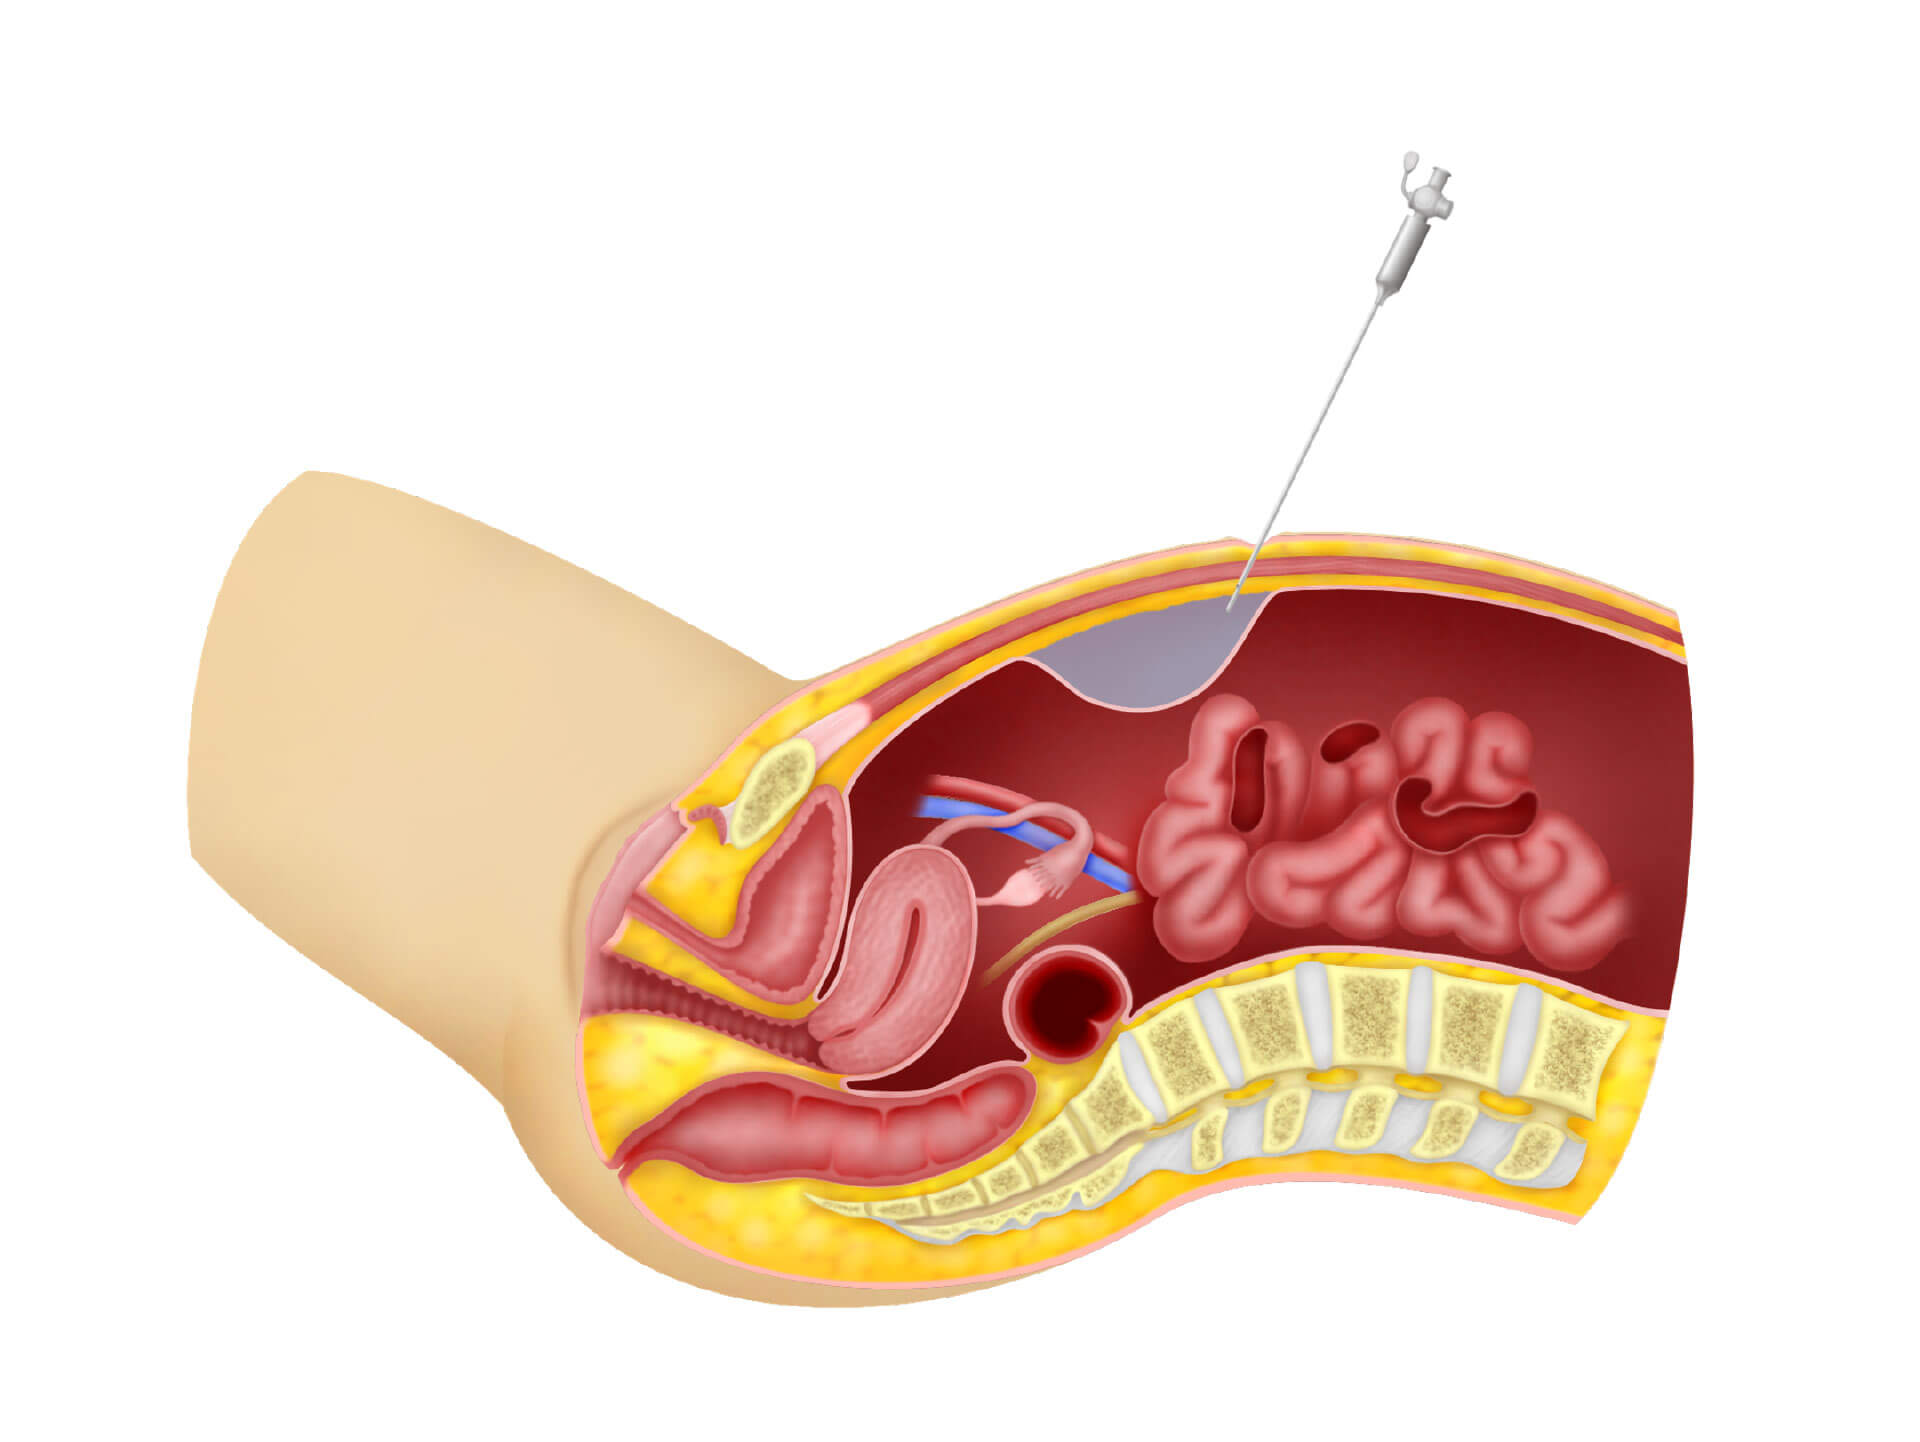
- as you push the needle in you should have 3 clicks, The first is when you go through the fat tissue, the second is when you penetrate the rectus sheath and the third is when you pass the peritoneum. This may not be as clear in clinical practice.
- Aspiration test
Using an empty syringe, aspirate first. If nothing is aspirated then you are either in the peritoneal cavity or the subcutaneous tissue. If you aspirate brownish fluid you may be in the bowel. If you aspirate blood you may be in a blood vessel. If you are in the peritoneal cavity, you should feel a negative pressure. If you don’t get the feeling of a negative pressure, you may be in the subcutaneous space. - Injection of Air
I usually inject some air using a syringe into the Veress needle. The air should flow in easily without any resistance if you are in the peritoneal cavity. I will then aspirate. If you still have a negative pressure, then you are in the peritoneal cavity. If you don’t have the feeling of a negative pressure, then you are probably in the subcutaneous space. - Hanging drop test
Using a syringe filled with water, inject some water into the Veress needle and then aspirate. If you aspirate fluid then you are in the subcutaneous tissue. You can then place a drop of fluid on the Veress needle and pull on the abdomen. With the negative pressure the fluid will move down the Veress needle into the abdomen indicating that you are in the abdominal cavity - Hissing sound test
When you pull on the abdomen with the Veress needle in place, if the Veress needle is in the abdominal cavity you may hear a hissing sound of air being sucked into the abdomen by the negative pressure in the abdomen. - Manometer.
Attach the gas tubing to the insufflator machine. Do not turn the machine on. Look at the pressure on the machine. Now pull on the abdomen and the pressure should reduce if the Veress needle is in the correct place - Needle flow test
Once you are happy with the insertion of the Veress needle, attach it to the insufflator and set the machine to 4-6 mm Hg with a gas flow of 1 litre/min. If the resistance is high then there is some obstruction inside the Veress needle. - Percussion test
Tap or percuss on the abdomen to see whether gas has gone into the abdominal cavity - Sounding test
Before placing the trocar into the abdomen, you can do a test with a syringe attached to a needle and aspirate around the umbilicus. If you aspirated air into the syringe then there is no bowel adherent to the umbilicus.
4. What do you do if you have accidentally insufflated the subcutaneous layer?
This can be a very stressful situation. Sometimes you only realise it after placing the trocar. The gas in the subcutaneous tissue is called subcutaneous emphysema . Remove the Veress needle or the trocar . Reinsert but it may not be able to penetrate into the peritoneal cavity because the peritoneum will be at a greater distance from the skin. You could try to use a longer Veress needle and go perpendicular to the umbilicus into the abdominal cavity. You must be careful not to hit the aorta or venacava. Aspirate and see that you are not aspirating blood. If there is a negative pressure then you may be in the peritoneal cavity. If you are not sure remove the Veress needle.
The next step is to either do an open laparoscopy or place the Veress needle at the Palmar’s point. Other more exotic methods are placing the Veress needle through the vagina through the posterior fornix into the Pouch of Douglas or even through the uterine cavity perforating the uterus.
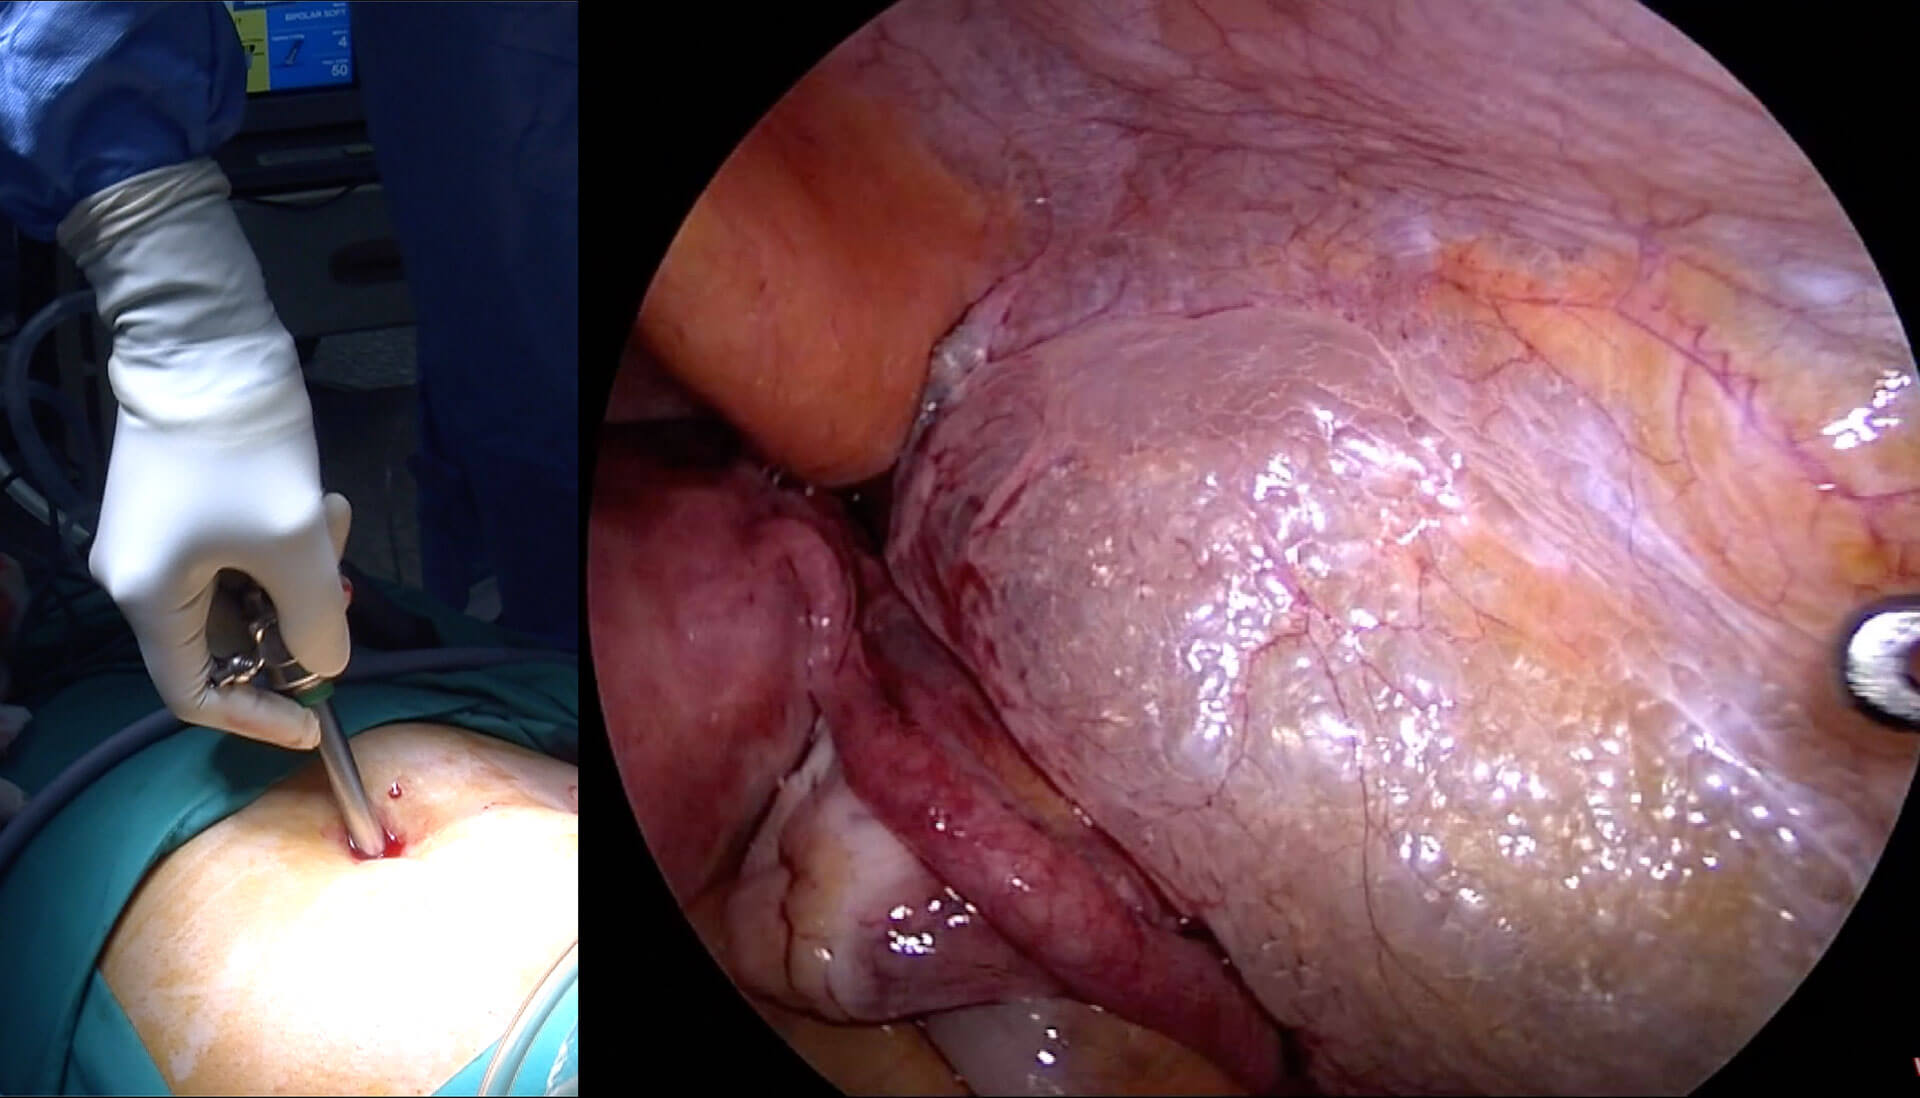
Once you have successfully placed the trocar into the abdominal cavity, you may find that the peritoneum is “hanging”. Bubbles in the subcutaneous tissue may obscure the pelvic organs. You can wait and usually the increased intraabdominal pressure caused by the carbon dioxide insufflation will push the peritoneum to the abdominal wall pushing all the gas in the subcutaneous tissue out. If the gas is not pushed out, you can place the outer sleeve of the Veress needle into the place where there is subcutaneous emphysema and the gas will leak out of the needle.
5. How to do insufflation through the Palmar’s point?
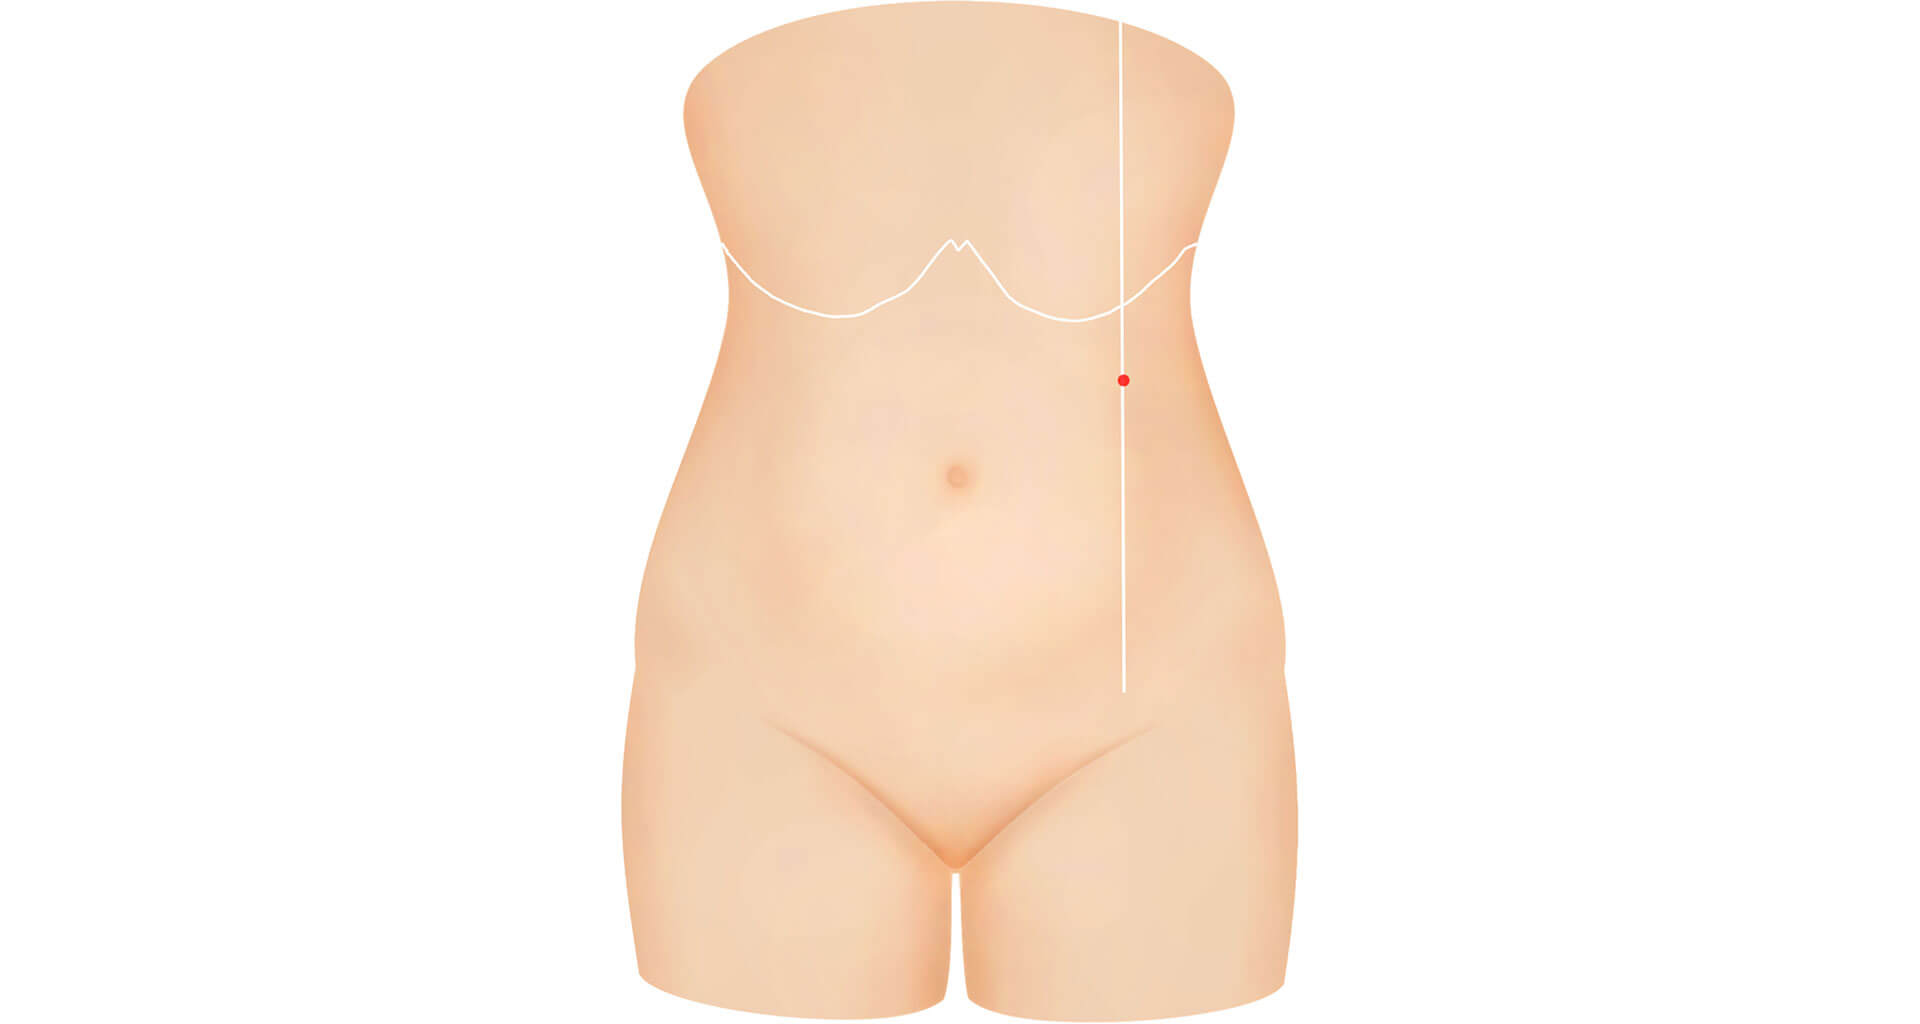
The Palmar’s point is described as 2 finger breadths or 3 cm below the costal margin at the level of the midclavicular line. A small incision can be made here and then the Veress needle is pushed into the abdominal cavity. You must ensure that the spleen is not enlarged and there has not been any previous surgery at this site. It is important that the stomach is empty. It is recommended that a nasogastric tube be placed if you are using this method. I perform this procedure slightly differently. I prefer to make the incision just below the costal margin instead of 2 finger breath below the costal margin. In this way the tenting of the skin and rectus sheath will allow me to enter the abdominal cavity easier than at a level 2 finger breadths below the costal margin.
6. Is Open laparoscopy superior to the Veress needle?
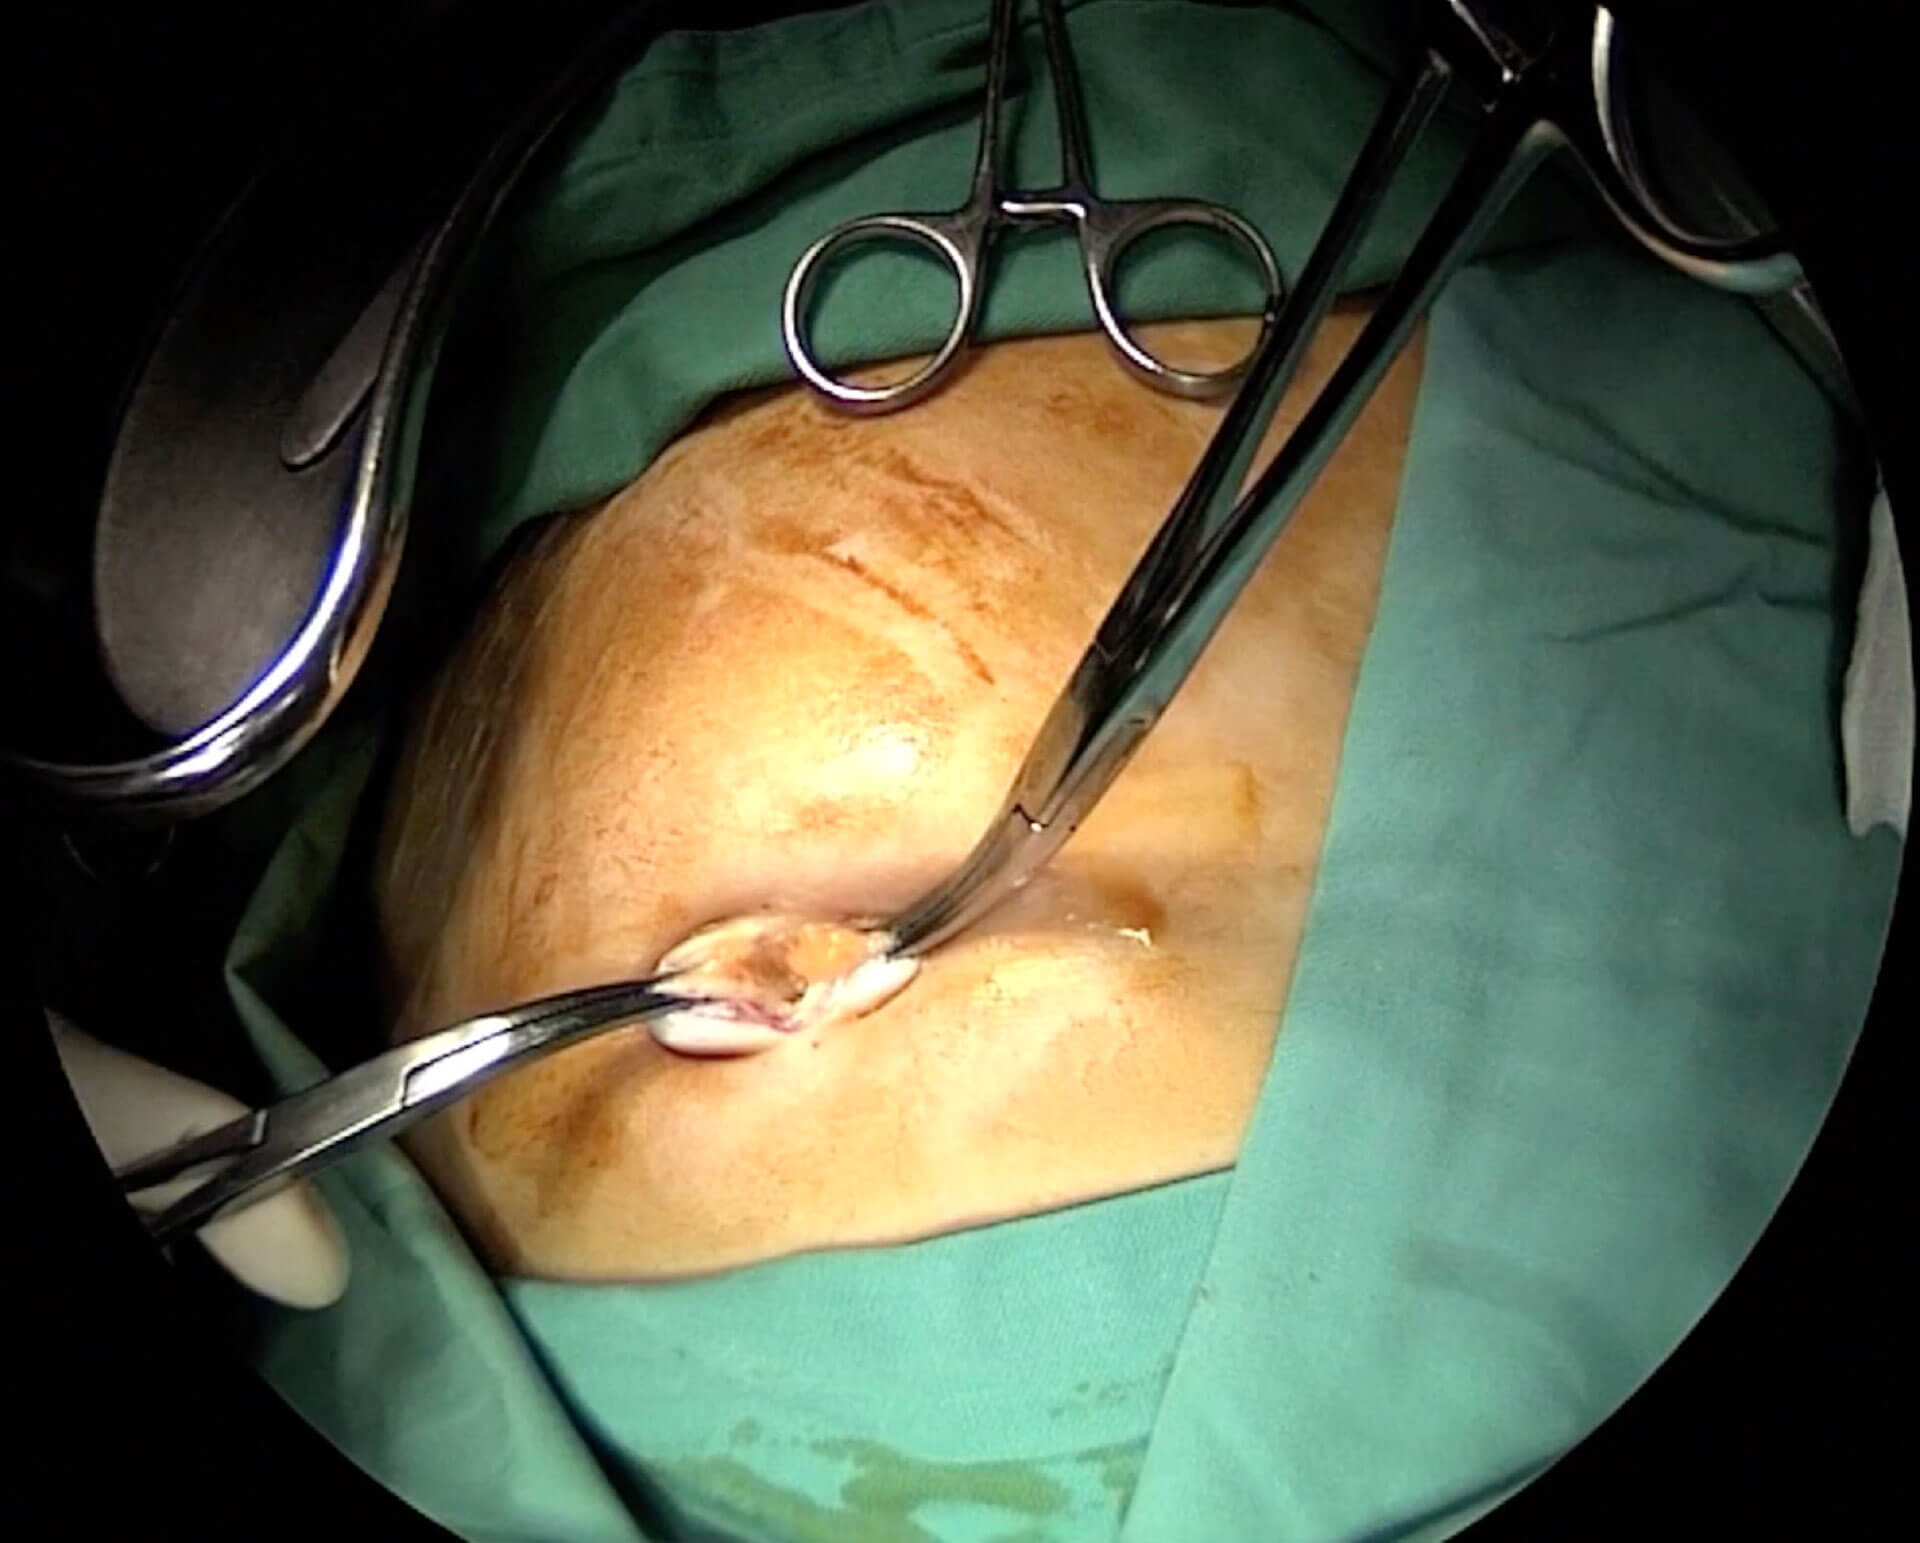
In Open laparoscopy, an incision is made in the umbilicus so that the rectus sheath and peritoneum is opened under direct vision. The trocar is then inserted and then carbon dioxide insufflation is done. This is a method commonly used by the general surgeons. It has several advantages:
Advantage of Open Laparoscopy are
- Not a blind procedure
- Easy to learn and perform
- Less risk of hitting the major blood vessels especially the aorta and vena cava
- It does not decrease the incidence of bowel injury but if it occurs, it can be seen immediately and repair can be done
Disadvantage
- Leakage of gas may occur from the large incision. If this happens, a Hasson sleeve can be placed to plug the leak or a purse string incision can be made around the trocar to tighten the rectus sheath around the trocar. However often the trocar may slip into the abdomen and this can be irritating when performing difficult surgeries.
- The incision can only be done at the umbilicus. In gynecology, the camera port may be placed higher up above the umbilicus. It is difficult to do an open laparoscopy from this site.
7. Which trocar should I use disposable, reusable, optical or tennermian?
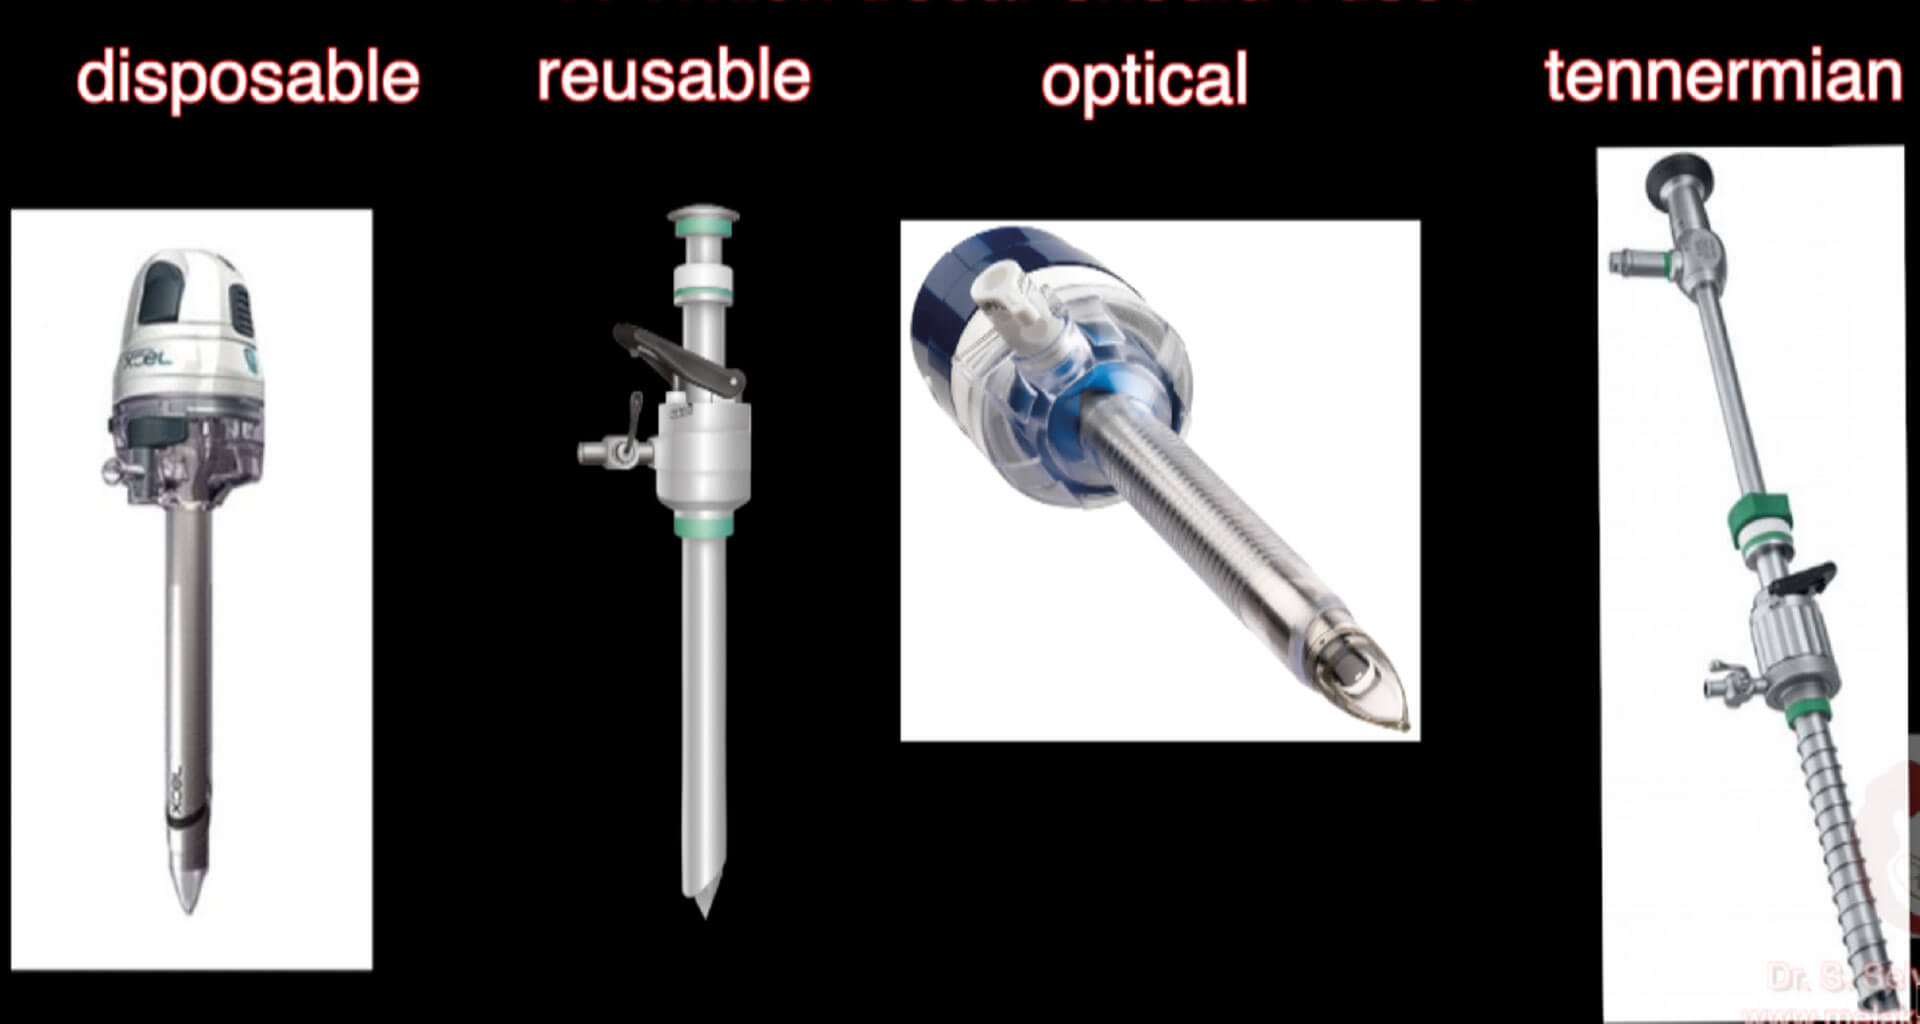
Choose what you are comfortable with. Some disposable trocars come with automatic retractable blades. These are convenient and safe but expensive. Optical trocars are nice. Here a laparoscope is placed in the trocar and then rotated into the abdominal cavity while looking at tissues that it penetrates. This can be used even without insufflation. Tennermian trocar can also be used with direct vision as the trocar passes into the tissues. Each one has its own advantages and disadvantages. I use a normal reusable trocar. I open the valve that is for carbon dioxide insufflation. I push the trocar slowly, rotating it to the left and to the right and into the abdomen until I hear a hissing sound of the gas leaking out of the trocar. This indicates that the trocar has penetrated the rectus sheath. I then place the laparoscopy and push the trocar slowly past the rectus sheath and into the abdomen.
You can watch the video on:
https://www.youtube.com/watch?v=lcji4JNouko
https://vimeo.com/manage/405313344/general
Selva
Sevellaraja Supermaniam
8/4/202